Washing Clothes on the Road: or the hotel sink is your best friend
What do you do when you have a flight scheduled for a business trip or a vacation and you do not want to carry check-in baggage? First of all I try not to check baggage unless it is absolutely necessary. Even for extended vacation stays you can get away with carry on baggage alone. Bring one backpack that will fit all of your clothes and miscellaneous items and one laptop/briefcase bag for your electronics. Following is my list of clothing I bring on all but the most extended trips:
Four pair light weight underwear (wearing one)
Four pair socks (wearing one pair)
Two button up shirts (wearing one)
Two T-shirts
Two pair pants (wearing one)
Travel Towel
One jacket (windbreaker or fleece depending on season)
One pair shoes hiking or sneakers based on preference (wearing)
If your trip requires formal attire either for business or dining a check-in bag will be necessary. I put all of my reading material and toiletries in my laptop bag for easy access and I am sure to have on my person my passport and wallet at all times. Zipped cargo pants or a money belt is highly recommended.
You will want to change your underwear and socks every day and your shirt every other day depending on the heat. If you have a two day layover the washing routine is very easy if you are in the hotel for only one night it is more difficult. If possible put dirty clothes in a plastic bag that you bring with you until you get a longer time frame to work with. You should routinely bring large capacity zip lock bags on every trip. You will also need to carry a small amount of laundry detergent with you in a smaller zip lock bag. When convenient use either the large zip lock or the hotel sink to soak your clothes in warm soapy water. After scrubbing the clothes with your hands for several minutes let sit in the warm water and then scrub again. After about 20 minutes rinse the clothing with fresh water. Twist the clothing as much as you can to get as much water as possible out. Take the still damp clothing, place it in a dry hotel towel and roll the towel into a cylinder as tight as possible. The dry towel will absorb even more moisture. Remove the damp clothing and hang in an airy location in the hotel room. By morning your clothes should be clean and fresh albeit slightly wrinkled.
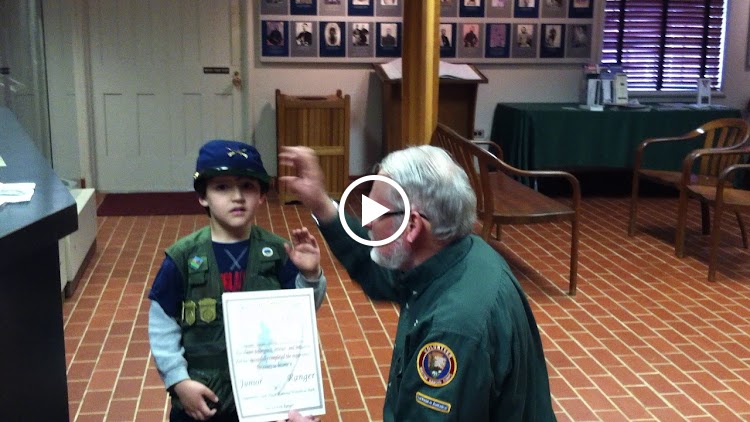
“Explore, Learn and Protect!” This is the moto of the National Park Service’s junior ranger program. Rita and I have been fans of the National Park system for years and were avid visitors and passport stamp collectors. When Alex started visiting parks with us we discovered the junior ranger program and found it to be a great way to get a young child interested in the history or natural splendor of the parks.
When you visit a park go directly to the visitor center and ask the ranger on duty about their junior ranger program. The ranger will give out the booklet and explain the activities needed to recieve the badge. Many parks also have the booklets available on-line so that they can be printed out before your visit. This is a good option because some of the activities involve coloring or drawing which can be done in the hotel room or at home before your visit. Most of the activities though are geared to exploration of the park you are in. You will have to look for various items or answer some questions based on park displays.
Working with your child can be great fun. We find that reading the booklet and helping Alex explore the park makes it all the more rewarding for us as well.
To get started I would suggest going to the junior ranger tag under the kids section of the National Park Service main site. There are several junior ranger badges that your child can earn with on-line programs from home!
Explore the parks with your kids and create memories that will last a lifetime.
As someone who is slightly OCD and has a passion for travel I was thrilled when I discovered long before we had the idea for this web site that there was several active lists where you could log your travels and tabulate your current country or travel count. In the scroll bar on our website you will find the combined lists for Rita and me of all the places we have gone either alone or collectively. We have no illusions that we will ever complete any of the lists we have but it is a fun way to keep track of our adventures.
Now what do we consider a visit? For example I have Atlanta as an airport on my airports I have visited list but I literally ran from one terminal to another to catch a connection so I do not count Atlanta as a city visited. It is however your list and there are no rules so use whatever criteria you are comfortable with. We use the lists to enhance our travel experience not just to tick off destinations. We have traveled to places and seen sites solely because they are on a list of US National Park Sites or World Heritage Sites. We would have missed out on tremendous adventures if we were not pointed in the right direction.
A lot of these lists are the highlights of a certain place especially the US NPS and WHS lists. It reminds me of a phrase that has come into vogue in the last few years “be a traveler not a tourist.” This idea crystallized for me when I was watching Anthony Bourdain on a show he was doing on Egypt. In the program Tony was sitting in a café with the pyramids over his shoulder. He said and I am paraphrasing; “most people will go to see the pyramids over there but instead I will take you to a peasant area for a cultural experience.” I said to myself no, I want to see the pyramids and if there is any time left I will try to fit something else in but it will probably be a museum or other “tourist” attraction. If that makes me a tourist instead of a traveler than I am happy with the label. Does anyone else miss the days 30 years ago when if you could find a travel program on TV it was a travelogue of top sites for a particular destination and not a rundown of what the people in those destinations are up to?
So where do we begin with our lists. Let’s start with the most obvious.
The List of Countries Recognized by the UN (193)
This is all of the sovereign countries in the world but does not include territories or entities such as Taiwan, Palestine, or Puerto Rico.
The UN Plus List (198)
The UN list with a few additions like Taiwan, Palestine, etc. The Best Traveled UN Plus List (266)
The UN list with territories and all disputed countries listed
These are good starting point but are too limiting for our tastes. Can you say you have seen the US if you visited Atlanta on a flyover from Europe to Central America. Huge countries like the US, China and Russia cannot be pigeonholed into one all encompassing location. It makes more sense to me to break down Russia into 85 Oblasts and the US into 50 States.
TCC List [The Traveler’s Century Club] (325)
This club has been around for 60 years and includes almost all of the disputed countries, territories and outlining islands but does not include states, oblasts or provinces.
The Most Traveled People (MTP) List (875)
This is my second favorite list and is quite comprehensive with its territories and country’s major subdivisions.
The Jeff Shea SISO List (6978) The CHAD –Country Hybrid Administrative Divisions (6338)
These massive lists break each country into administrative units be it state, canton or county. There are some inconsistencies in the SISO list some of the Balkan countries have no subdivisions but Slovenia has 193! The UK has 232 subdivisions. The CHAD list I think is more Reasonable eliminating some of the minor subdivisions and adding back in some that were missing from other countries.
The Best Travelled List (1281)
Finally if you want one list that is both reasonable and doable this is the best site and best list. Countries are divided up into logical sub-divisions and the site has easy to use click friendly draw down boxes. The added benefit of this site is that you can update all of the above lists on the one site. In addition to the lists above the TBl site also provides lists of World Heritage Sites, Major Cities, Airports, Attractions, etc. A fun site to play around with it gets my highest reccomendation.
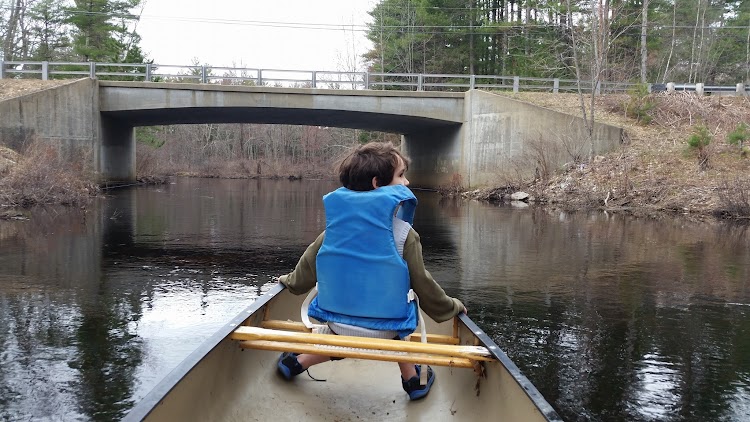
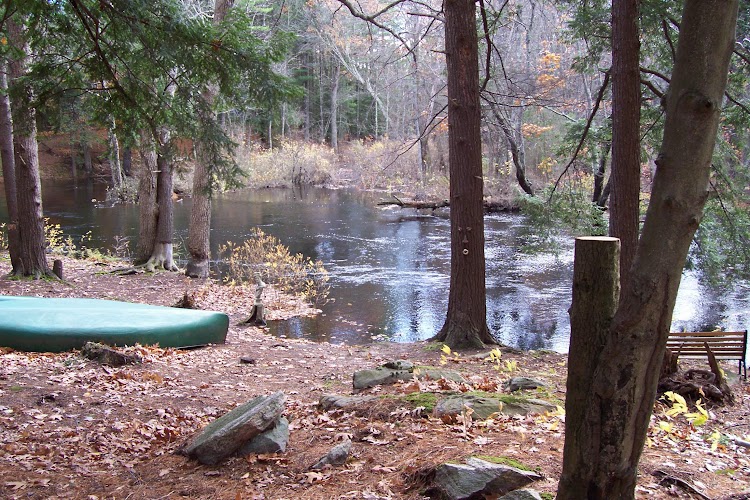
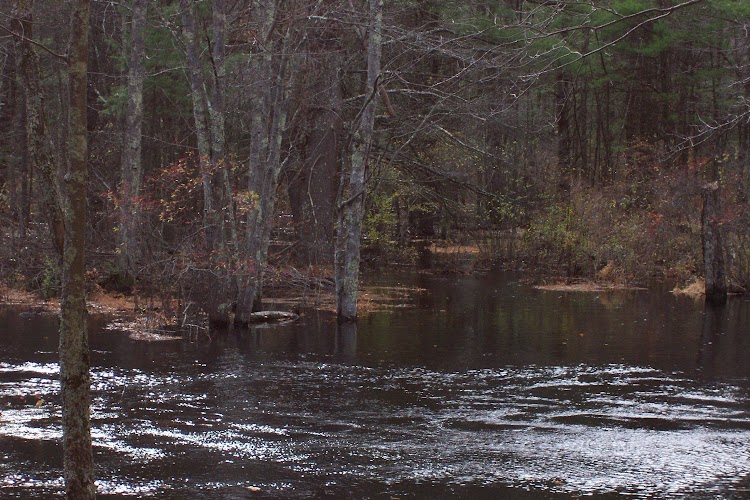
To truly experience wilderness you need to put the road behind you and get away from the sounds and sights of modern 21st century living. My preferred method is the canoe; it allows for a greater carrying capacity than backpacking and is easier on the feet.
If you put a few portages behind you the people disappear and the wilderness experience you have always wanted becomes manifest. Canoeing is open to all levels of expertise from easy flat-water paddles to thrilling whitewater adventures. For trips of a week or more I recommend the Machias, St. John or Allagash Rivers in Maine. These will give you a true wilderness adventure. A great alternate to river travel is to lake hop in areas such as Algonquin Provincial Park in Ontario or the Boundary Waters Canoe area on the Minnesota-Ontario border.
Once you decide on a trip that matches your skill level and travel schedule it is time to prepare for your trip. I am not going to cover the canoe skills or trip arrangements in this blog (there are numerous sources available). I will cover here how to plan and execute a meal plan for a trip of one week. Canoeing is a huge advantage over backpacking in terms of eating well while in the wilderness. The first thing you need to determine is; are campfires permitted? And what type of packaging is allowed. Let’s assume you can build a small campfire and you are in an area allowing cans (not allowed in the BWCA). This is a meal plan for 4-6 people and a leisurely trip stopping each day around 4:00 PM.
Resource list: Dutch Oven Griddle
Nested Cook Set
Cloth Napkin
Spatula
Cooking Oil
Wire Grill
Condiments (salt, pepper, Adobe seasoning, etc.)
Knife
Small camp stove (backpacker type)
Fuel for stove
Water filter
Backpack waterproof cooler
Before getting into the menu there are a few things to go over. A Dutch Oven and griddle seem to be extravagant items to take on a wilderness trip and no doubt you will be cursing during a long portage. However the flexibility and capability for preparing “home cooked” meals more than makes up for the extra weight. If you focus on the trip and the experience instead of the final destination your enjoyment of the adventure will compensate for the inconveniences. Take your time each night enjoy your surroundings and have a real meal. If you make a point of stopping early you can take a swim, go on a short hike or fish while your meal is being prepared. My philosophy of wilderness meal planning is to have a hearty breakfast, a light no cook lunch (granola and trail mix could suffice) and a multicourse well cooked dinner.
A division of labor is critical for this plan. You must have someone willing to be “Camp Chef” and the other members of the group need to take care of the set up and striking camp duties. Dish washing should also be done by someone other than the chef so that he/she has some downtime.
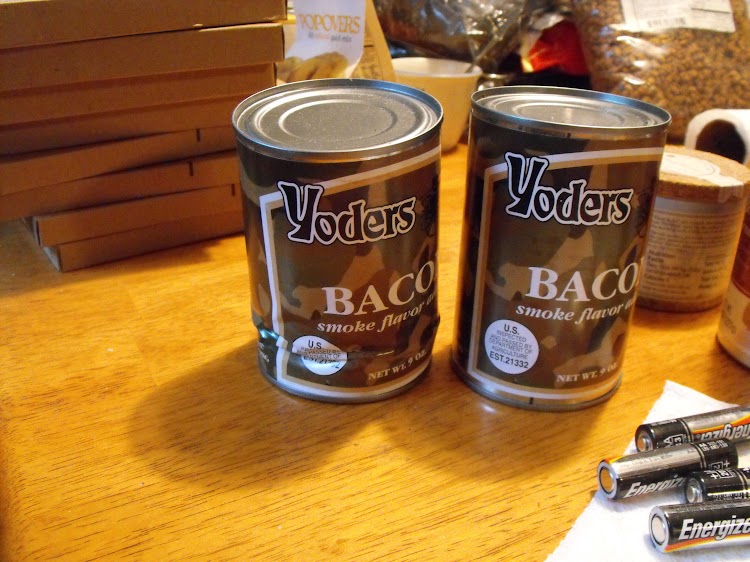
The ingredients for the trip do not have to break the bank. Almost all of the items are readily available in the grocery store and you do not have to utilize very expensive backpacking supplies. There are a few specialty items that you will need for this menu. The US military has rations designed for their combat troops called “Meals Ready to Eat (MREs).” I always take some of these along for the side dishes and as an emergency backup. I also find powdered vegetable oil and powdered eggs useful. Several suppliers offer canned bacon that you can order on-line.
It is best to burn the can after use to eliminate odors. Remember to pack out everything you bring in. Freeze any meat you will not be using the first day and put it into the bottom of your waterproof backpack cooler. It will act as ice for the items you will be eating the first few days. One last tip, especially for grocery store items, repack into bags or containers more suitable.
Below is a sample seven day menu, I have gone on trips as long as two weeks and have had meals such as; roast leg of lamb, pork shoulder and New England boiled dinner on the side of a river or lake.
Day one
Breakfast At home or on the road on way to put in
Lunch (on the river) Subs (either homemade or picked up at a sub shop)
Dinner Roast Turkey with instant mashed potatoes, stove top stuffing and canned cranberry sauce
Day two
Breakfast Omelet with turkey, onions and peppers
Lunch Granola, meat sticks, cheese
Dinner Turkey Stew
Day three
Breakfast Bacon and scrambled eggs
Lunch Beef Jerky
Dinner Steak with MRE side dishes
Day four
Breakfast Pancakes
Lunch Canned fish; sardines, tuna
Dinner Roast Canned Ham with potatoes
Day five
Breakfast Ham omelet
Lunch Tinned Meat
Dinner Pea soup
Day six
Breakfast Biscuits (fresh baked) or bannock
Lunch Granola
Dinner Pasta with pesto
Day seven
Breakfast Pancakes with bacon
Lunch Leftover lunch items
Shopping list:
Turkey
Instant mashed potatoes
Stove Top stuffing mix
Onion
Green peppers or chilies
Potatoes
Carrots
Granola bars and other snack type items
Trail mix
Canned Bacon
Meat sticks (pepperoni, Slim Jim)
Cheese (String, individually wrapped)
Steak
Powdered eggs
Pancake mix
Tinned fish (tuna, sardines, etc.)
Tinned meat (chicken, ham, spam, etc.)
MRE vegetable side dishes
Split peas
Biscuit mix
Remember you can always supplement with fresh fish or foraged items such as berries or mushrooms (only if you have a qualified forager in your group).
The key takeaway is use the grocery store to full advantage and pay a little extra price on the portages to make your trip as memorable as possible.